k8s 高可用集群3:VIP:HAProxy、keepalived
Kubernetes(k8s)高可用集群3:VIP:HAProxy、keepalived
为何要使用负载均衡器VIP(HAProxy、keepalived)
- k8s Master 初始化配置时,使用负载均衡器,可以将 apiserver 的请求转发到不同的机器上,避免一台服务器宕机,造成所有节点不可使用。
- 如果不使用负载均衡器,先创建一个 k8s Master,然后再加入其他的 k8s Master,当第一台 k8s Master 宕机时,后面加入的 k8s Master 将无法使用(因为请求是发送给第一台 k8s Master 的 apiserver)
- 有了 keepalived 为何还需要 HAProxy,keepalived 不是直接可以创建 VIP(虚拟IP)吗?如果 keepalived 与 k8s 所在的机器是同一台,则可以这样做(每台机器必须同时存在 k8s、keepalived),并且虚拟IP在哪台机器上,最终调用的就是哪台机器,有可能会出现虚拟IP所在的机器正常,但是k8s不能使用的情况。实际情况可能是会有单独的负载均衡服务器VIP(不与 k8s在同一台机器上)。
- 为何不使用 k8s Service 的 IP?因为 k8s Service 的 IP 可能在外部机器无法访问,并且 Service 的IP是随机的,每个 Service 不同。所以对外提供服务时,使用的是 VIP(Virtual IP Address 虚拟IP)
安装配置
安装配置 HAProxy(三台服务器均需要执行)
shellmkdir -p /etc/kubernetes/ cat > /etc/kubernetes/haproxy.cfg << EOF global log 127.0.0.1 local2 chroot /var/lib/haproxy pidfile /var/run/haproxy.pid maxconn 4096 user haproxy group haproxy daemon stats socket /var/lib/haproxy/stats defaults mode http log global option httplog option dontlognull option http-server-close option forwardfor except 127.0.0.0/8 option redispatch retries 3 timeout http-request 10s timeout queue 1m timeout connect 10s timeout client 1m timeout server 1m timeout http-keep-alive 10s timeout check 10s maxconn 3000 frontend kube-apiserver mode tcp bind *:9443 option tcplog default_backend kube-apiserver listen stats mode http bind *:8888 stats auth admin:password stats refresh 5s stats realm HAProxy\ Statistics stats uri /stats log 127.0.0.1 local3 err backend kube-apiserver mode tcp balance roundrobin server k8s-master1 $MASTER_1_IP:6443 check server k8s-master2 $MASTER_2_IP:6443 check server k8s-master3 $MASTER_3_IP:6443 check EOF cat /etc/kubernetes/haproxy.cfg docker run \ -d \ --name k8s-haproxy \ --net=host \ --restart=always \ -v /etc/kubernetes/haproxy.cfg:/usr/local/etc/haproxy/haproxy.cfg:ro \ haproxytech/haproxy-debian:2.3安装配置 keepalived(第一台机器:192.168.80.81)
shellcat > /etc/kubernetes/keepalived.conf << EOF ! Configuration File for keepalived global_defs { router_id LVS_1 } vrrp_script checkhaproxy { script "/usr/bin/check-haproxy.sh" interval 2 weight -30 } vrrp_instance VI_1 { state MASTER interface $INTERFACE_NAME virtual_router_id 51 priority 100 advert_int 1 virtual_ipaddress { $VIP_IP/24 dev $INTERFACE_NAME } authentication { auth_type PASS auth_pass password } track_script { checkhaproxy } } EOF cat > /etc/kubernetes/check-haproxy.sh << EOF #!/bin/bash count=\`netstat -apn | grep 9443 | wc -l\` if [ $count -gt 0 ]; then exit 0 else exit 1 fi EOF cat /etc/kubernetes/keepalived.conf cat /etc/kubernetes/check-haproxy.sh docker run \ -d \ --name k8s-keepalived \ --restart=always \ --net=host \ --cap-add=NET_ADMIN \ --cap-add=NET_BROADCAST \ --cap-add=NET_RAW \ -v /etc/kubernetes/keepalived.conf:/container/service/keepalived/assets/keepalived.conf \ -v /etc/kubernetes/check-haproxy.sh:/usr/bin/check-haproxy.sh \ osixia/keepalived:2.0.20 \ --copy-service mkdir -p /root/.ssh/安装配置 keepalived(第二台机器:192.168.80.82)
shell# 一路回车 ssh-keygen -t rsashellscp -P 22 /root/.ssh/id_rsa.pub root@$MASTER_1_IP:/root/.ssh/authorized_keysshellscp -P 22 root@$MASTER_1_IP:/etc/kubernetes/keepalived.conf /etc/kubernetes/ scp -P 22 root@$MASTER_1_IP:/etc/kubernetes/check-haproxy.sh /etc/kubernetes/ sudo sed -i "s#router_id LVS_1#router_id LVS_2#g" /etc/kubernetes/keepalived.conf sudo sed -i "s#state MASTER#state BACKUP#g" /etc/kubernetes/keepalived.conf docker run \ -d \ --name k8s-keepalived \ --restart=always \ --net=host \ --cap-add=NET_ADMIN \ --cap-add=NET_BROADCAST \ --cap-add=NET_RAW \ -v /etc/kubernetes/keepalived.conf:/container/service/keepalived/assets/keepalived.conf \ -v /etc/kubernetes/check-haproxy.sh:/usr/bin/check-haproxy.sh \ osixia/keepalived:2.0.20 \ --copy-service安装配置 keepalived(第三台机器:192.168.80.83)
shell# 一路回车 ssh-keygen -t rsashellscp -P 22 /root/.ssh/id_rsa.pub root@$MASTER_1_IP:/root/.ssh/authorized_keysshellscp -P 22 root@$MASTER_1_IP:/etc/kubernetes/keepalived.conf /etc/kubernetes/ scp -P 22 root@$MASTER_1_IP:/etc/kubernetes/check-haproxy.sh /etc/kubernetes/ sudo sed -i "s#router_id LVS_1#router_id LVS_3#g" /etc/kubernetes/keepalived.conf sudo sed -i "s#state MASTER#state BACKUP#g" /etc/kubernetes/keepalived.conf docker run \ -d \ --name k8s-keepalived \ --restart=always \ --net=host \ --cap-add=NET_ADMIN \ --cap-add=NET_BROADCAST \ --cap-add=NET_RAW \ -v /etc/kubernetes/keepalived.conf:/container/service/keepalived/assets/keepalived.conf \ -v /etc/kubernetes/check-haproxy.sh:/usr/bin/check-haproxy.sh \ osixia/keepalived:2.0.20 \ --copy-service访问以下地址,用户名:admin,密码:password
- http://192.168.80.81:8888/stats
- http://192.168.80.82:8888/stats
- http://192.168.80.83:8888/stats
- http://192.168.80.100:8888/stats
测试VIP(在三台机器上安装不同版本的 Nginx,用于测试,方便查看效果,测试完成将删除)
安装 Nginx 1.23.(第一台机器:192.168.80.81)
shelldocker run \ --restart=always \ -itd \ --privileged=true \ -p 6443:80 \ -v /etc/localtime:/etc/localtime \ --name nginx nginx:1.23.1安装 Nginx 1.23.(第二台机器:192.168.80.82)
shelldocker run \ --restart=always \ -itd \ --privileged=true \ -p 6443:80 \ -v /etc/localtime:/etc/localtime \ --name nginx nginx:1.23.2安装 Nginx 1.23.(第三台机器:192.168.80.83)
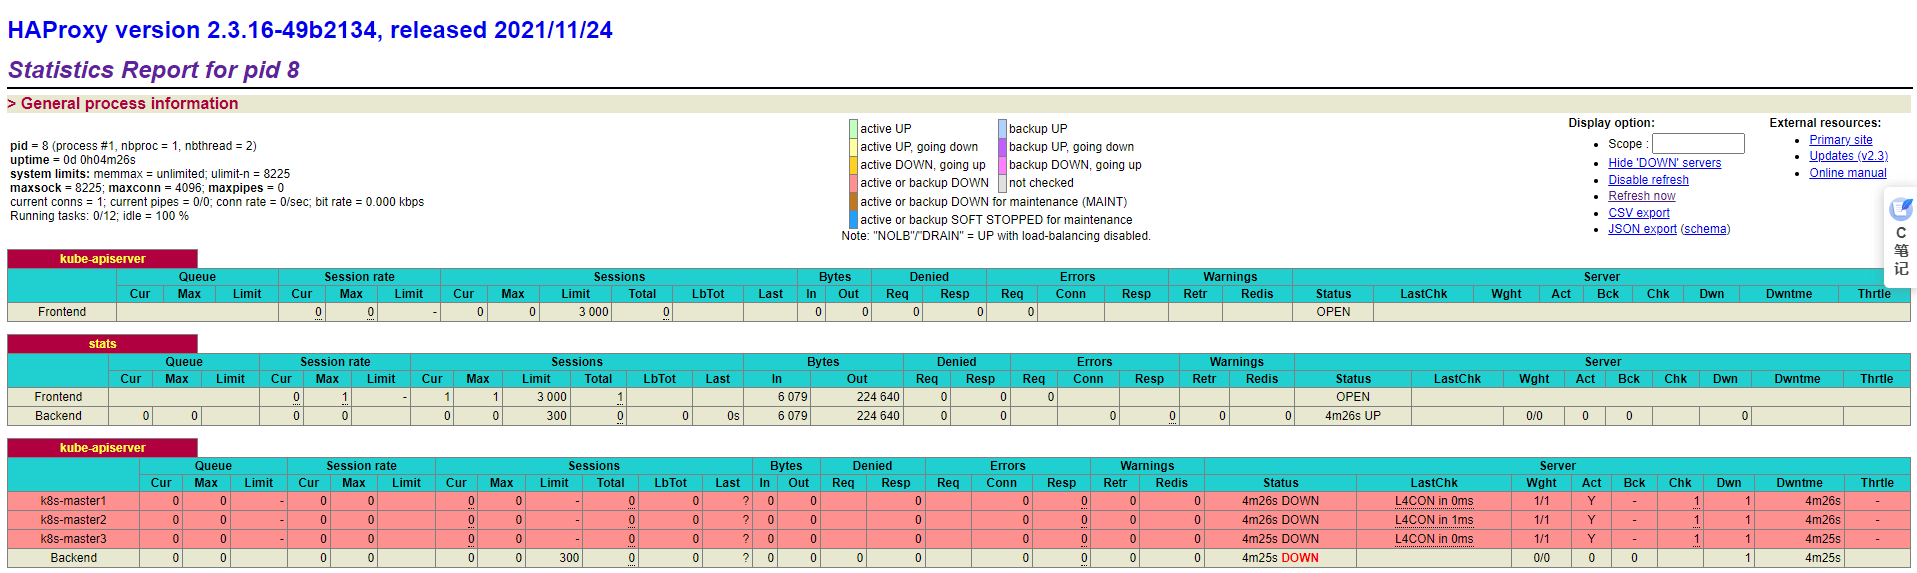
shelldocker run \ --restart=always \ -itd \ --privileged=true \ -p 6443:80 \ -v /etc/localtime:/etc/localtime \ --name nginx nginx:1.23.3访问任意一个地址,均能看见使用 nginx 替代的 k8s-master1,k8s-master2,k8s-master3 已上线
- http://192.168.80.81:8888/stats
- http://192.168.80.82:8888/stats
- http://192.168.80.83:8888/stats
- http://192.168.80.100:8888/stats

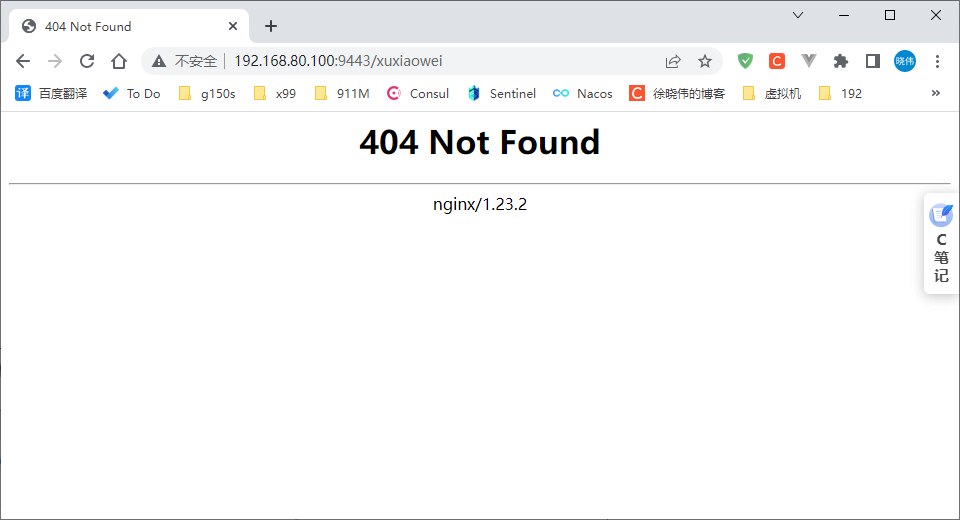
访问下列地址,能看到三台机器使用了不同的 Nginx 版本
访问 http://192.168.80.100:9443/xuxiaowei,可以看到 nginx 版本为 1.23.,访问的是第三台机器

将第三台机器 192.168.80.83 关机后访问 http://192.168.80.100:9443/xuxiaowei ,可以看到 nginx 版本为 1.23.,访问的是第一台机器

将第一台机器 192.168.80.81 关机后访问 http://192.168.80.100:9443/xuxiaowei ,可以看到 nginx 版本为 1.23.,访问的是第二台机器
- shell
docker stop nginx
docker rm nginx